Introduction
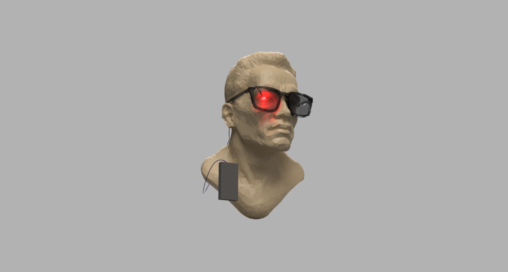
This project started as a Halloween costume idea and turned into a tiny electronics build that was way more fun than it had any right to be. I wanted a pair of sunglasses that looked like they belonged to a Terminator, so I made a simple setup with a red LED hidden behind one lens and a little bit of Arduino logic to make it feel more dramatic. If you are already comfortable with Arduino, this may feel very simple, but it is a nice way to get started with a project that looks cool right away.
The goal was to get that classic red glow from the Terminator poster while keeping the whole thing light and wearable. I taped a red LED behind one lens, added a button so I could turn it on and off, and then added a potentiometer so I could control how fast the light blinked. It was a small build, but it had just enough customization to make it feel personal.
Hardware
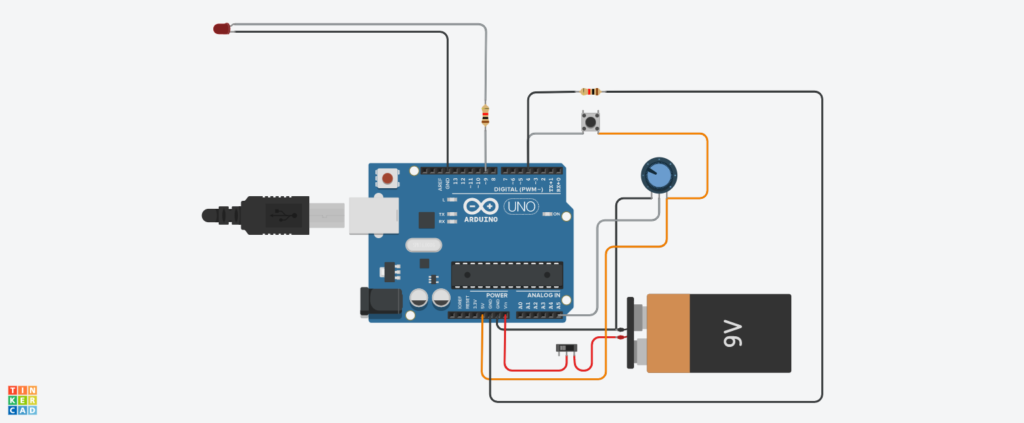
The parts for this build are pretty minimal, and the diagram below shows how everything connects. It is the kind of project that is simple enough to build quickly, but still gives you a nice sense of how basic circuits and microcontrollers can come together in a fun way.
| Component | Quantity |
|---|---|
| Arduino Uno R3 | 1 |
| 1K ohm Resistor | 2 |
| Red LED | 1 |
| Potentiometer | 1 |
| Push Button | 1 |
| 9V Battery | 1 |
| Switch | 1 |
Project diagram
Programing
The code below is commented in a straightforward way, so it should be easy to follow even if you are still getting used to Arduino. If something is unclear, feel free to ask in the comments.
boolean butstate = false; // This variable describes if the LED is blinking or not
boolean lastbutton = false;
int blinkTime = 30; // This controls the speed of the blinking
int button = 4;
int pot = 5;
int led = 9;
int brightness = 0;
int fadeAmount = 5;

void setup() {
  pinMode(button, INPUT);
  pinMode(led, OUTPUT);
}

void loop() {
  blinkTime = analogRead(pot); // reads the potentiometer value
  if (digitalRead(button) == HIGH && lastbutton == LOW) {
    butstate = !butstate;      // toggles state on button press
    lastbutton = HIGH;
  }
  else {
    lastbutton = digitalRead(button);
  }

  if (butstate == HIGH) {      // if "butstate" is HIGH, LED blinks/fades
    analogWrite(led, brightness);
    brightness = brightness + fadeAmount;
    if (brightness <= 0 || brightness >= 255) {
      fadeAmount = -fadeAmount;
    }
    delay(map(blinkTime, 0, 1023, 3, 150));
  }
  else {                       // otherwise, LED just stays solidly on
    analogWrite(led, 255);
  }
}
Assembly
I taped the LED behind one lens and ran a long wire back behind my ear and into the inside pocket of my leather jacket, where the electronics were tucked inside a small cardboard box. That way, the controls stayed easy to reach while the wearable part stayed simple and lightweight. The final result is shown in the video below.
Comments
Comment with your GitHub account.